Natural Light for Portraits
Are you a novice photographer who is looking to improve your photography skills? I’ll be sharing some of my favorite ways to use natural light for portraits inside my private Facebook group and I wanted to give you a sneak peek at these natural light tips!
How to use natural light outdoors
Before we get to the how let’s talk about the what. These are my most frequently used camera settings when shooting in natural light:
Aperature 2.0 – 4.0
Shutter speed 1/250 – 1/4000
ISO 200 – 2500
Now that you have your manual settings ready, let’s talk about how to use back light to get those light and airy photos that your clients will swoon over. Here are some tips on how to get back lighting to work for you when shooting outdoors:
- Use trees or other background objects to strategically filter and block the lighting as desired.
- Pay close attention to lens flare and where it appears within your image. In most cases, you should avoid lens flare on your subjects, especially over their faces.
- Be careful not to overexpose your image with the light going directly into your lens.
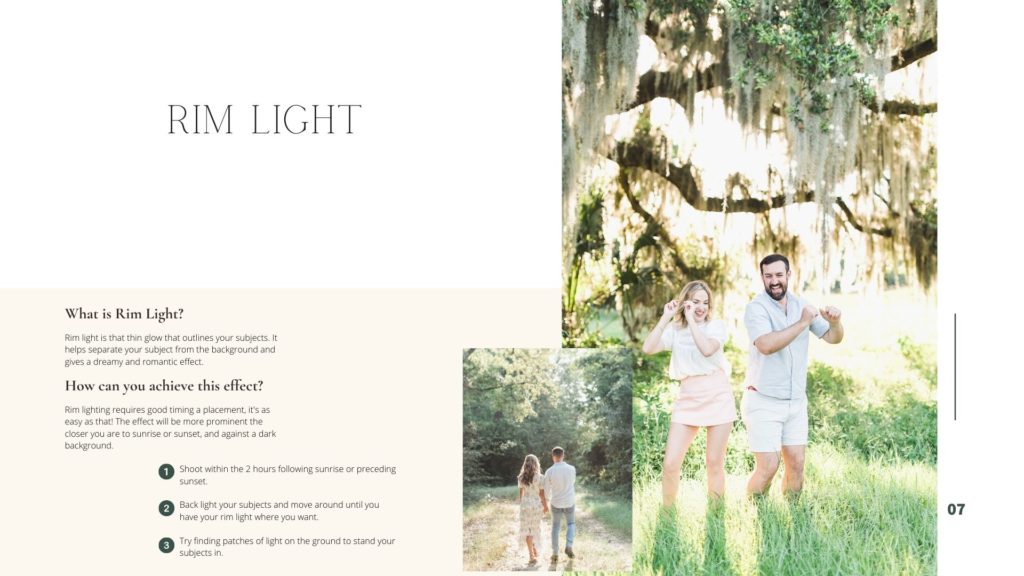
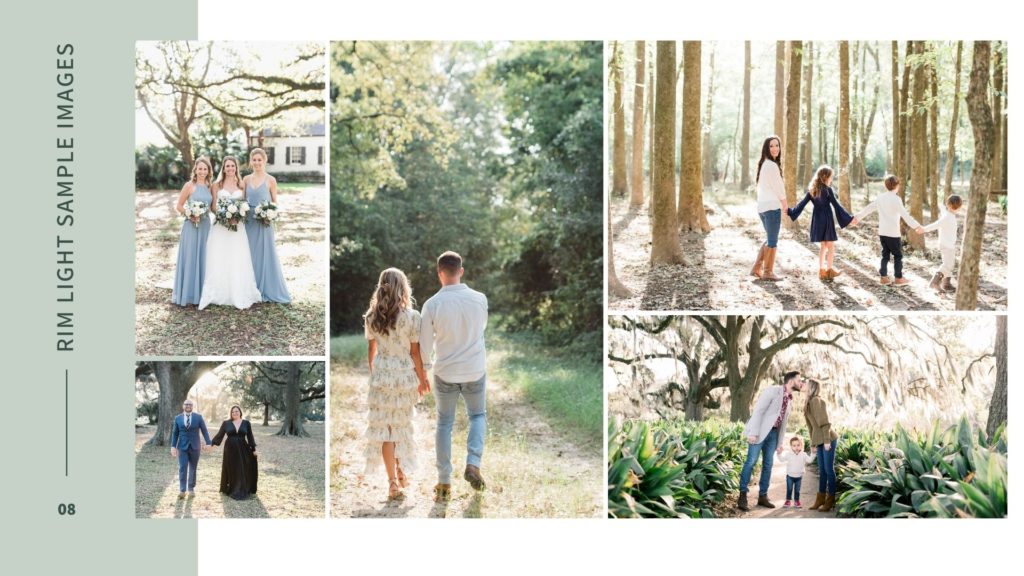
If you’re looking for that golden hour glow, you can use rim lighting to achieve a romantic and dreamy effect. Look for patches on light on the ground to stand your subjects in and then simply make adjustments until the rim light appeas where you want it. In general, I aim to have the most pronounced rim light around the arms, shoulders, neck, and hair.
- Place your subject against a dark background for a very dramatic look. This translates beautifully for black and white conversions.
- Have the sun directly behind or behind and to the side of your subjects. The light should be hitting their backs, shoulders, mid sections, ect.
- Your rim light will appear as a glowing outline around your subjects. Effectively separating them from the background and creating a very dreamy look!
For more pro tips on how to use natural light outdoors, join me inside the Facebook group for my exclusive free training!
Using natural light indoors
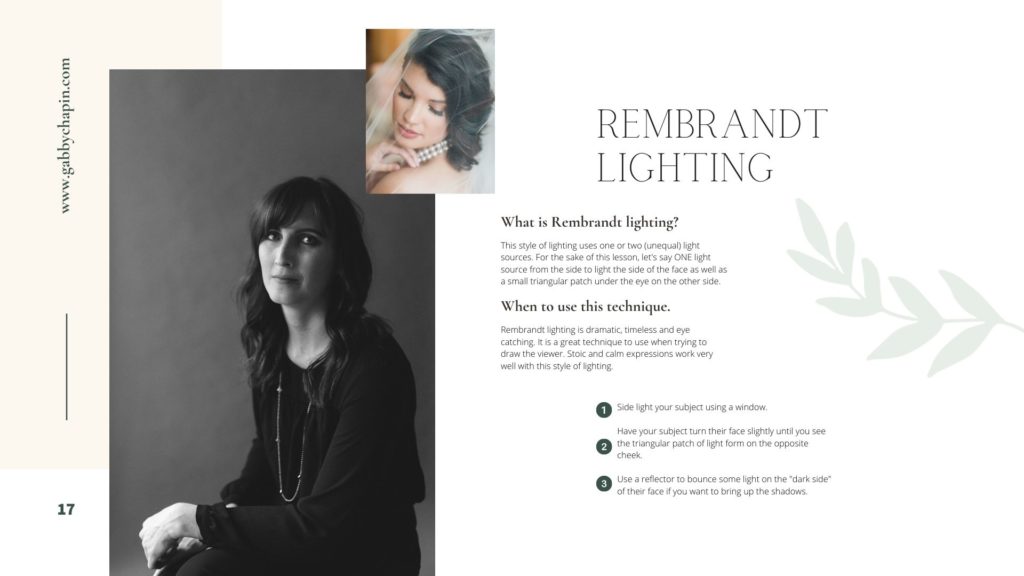
If you’re looking for a timeless, classic, and catching lighting method to use indoors, one of the most effective ways to use natural lighting is Rembrandt lighting. If you’re unfamiliar with what Rembrandt lighting is, it’s the use of one or two (unequal) light sources, to side light your subject’s face so that the opposite side sits in shadow with only a small triangular patch of light on their upper cheek just below the eye. It is truly one of the easiest lighting techniques out there! This technique creates a dramatic, eye-catching effect and is great to use when trying to draw in the viewer.
Use a window to back light indoors to create a shadowed image or silhouette. If going for the silhouette effect, you’ll want to underexpose your subject, but if you’re going for light and airy, you’ll want to slightly overexpose the shot.
For more pro tips on how to use natural lighting indoors, and how to capture stunning photos, regardless of what light is available, be sure to join my Facebook group for my free training!
Was this helpful? Drop me a line @ info@gabbychapin.com if you’d like to see something in particular!
xo
Gabby
I'm excited to hear from you!
Ready to work together?
you Love what you see
Inquire Now
